Do you ever find yourself standing at your garage door, desperately trying to remember which button to press on your universal remote? Well, worry no more! In this guide, we’re going to explore the fascinating world of programming a universal garage door remote.
So, you may be wondering, “How do I program a universal garage door remote?” Don’t fret, my friend, we’ve got you covered! Whether you’re a tech-savvy whiz or just starting your journey in the world of DIY projects, we’ll break it down into simple steps that anyone can follow.
Get ready to unlock the secrets of universal garage door remote programming and gain the power to open and close your garage door with just a click of a button. Let’s dive in and discover how to program your universal remote like a pro!
1. Identify the “learn” button on your garage door opener.
2. Press and hold the “learn” button until the indicator light turns on.
3. Within 30 seconds, press and hold the button on the universal remote you want to program.
4. Release both buttons when the indicator light on the opener blinks or turns off.
5. Test the remote by pressing the programmed button. Your universal remote is now ready to use!
How to Program a Universal Garage Door Remote: A Comprehensive Guide
Universal garage door remotes are a convenient and practical way to control your garage door. Whether you are replacing a lost or broken remote, or simply want to upgrade to a universal remote for added convenience, programming it may seem like a daunting task. However, with the right guidance, programming a universal garage door remote can be a straightforward process. In this article, we will provide you with a step-by-step guide on how to program a universal garage door remote, along with some helpful tips and troubleshooting advice.
Understanding Universal Garage Door Remotes
Before we dive into the programming process, it’s important to understand what a universal garage door remote is and how it works. A universal remote is designed to work with a wide variety of garage door openers from different manufacturers. It eliminates the need for multiple remotes, allowing you to control different garage doors or gates with a single device. Universal remotes typically use either dip switches or wireless programming to sync with your garage door opener.
Step 1: Identify the Type of Garage Door Opener
The first step in programming a universal garage door remote is to identify the type of garage door opener you have. This is crucial because different openers require different programming methods. Most garage door openers have a manufacturer and model number listed on the opener itself. If you can’t locate the information on the opener, consult the owner’s manual or contact the manufacturer for assistance.
Once you have the necessary information, research which programming method is required for your specific opener. This information can usually be found in the manual or on the manufacturer’s website. There are two main types of programming methods: dip switch programming and wireless programming. Dip switch programming involves setting dip switches on both the remote and the opener to match, while wireless programming typically involves following a specific sequence of button presses.
Understanding the programming method required for your garage door opener will make the programming process much smoother and reduce the chances of errors or complications.
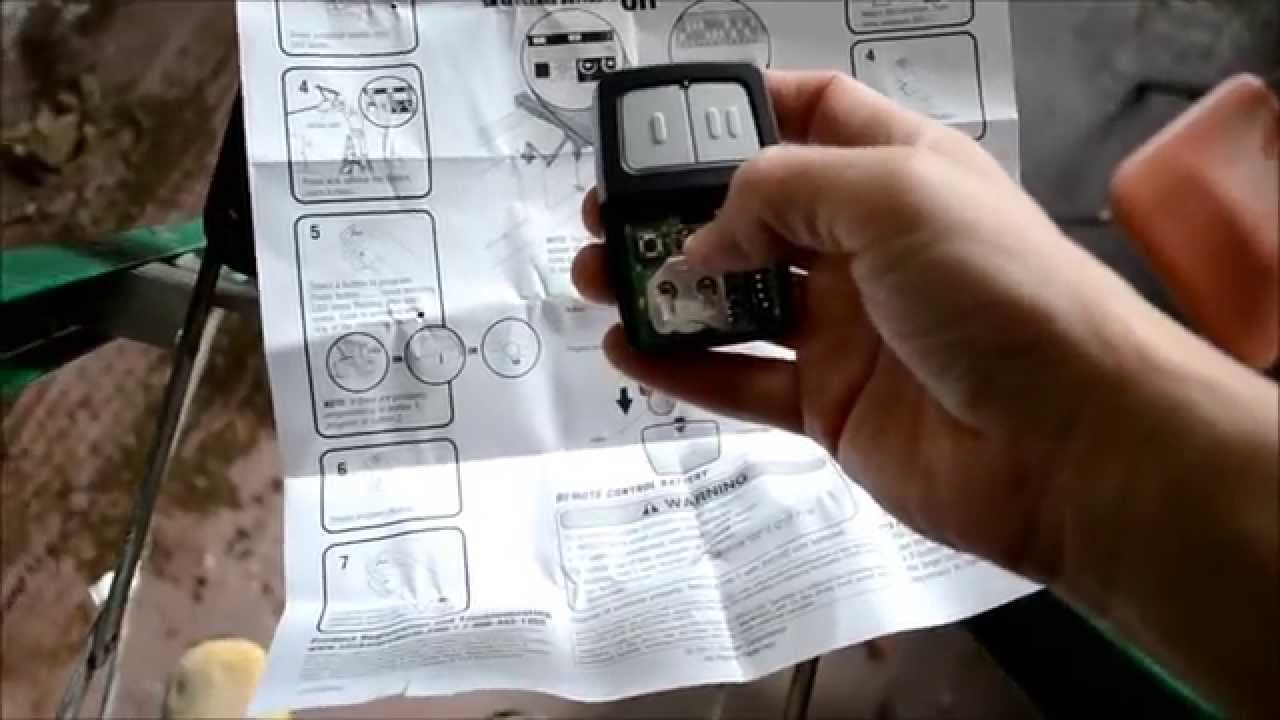
Step 2: Prepare the Universal Remote
After identifying the programming method, it’s time to prepare the universal remote for programming. Start by following the instructions provided with the remote to access the programming mode. This may involve pressing and holding certain buttons or setting specific dip switch configurations.
Once you have entered the programming mode, ensure that the universal remote is clear of any previously programmed codes. This can usually be done by holding down a specific button or performing a factory reset. Clearing any existing codes will prevent interference and ensure a successful programming process.
Take note of any additional instructions or special considerations provided by the remote manufacturer. This could include specific button combinations or timing requirements that are essential for successful programming.
Step 3: Program the Universal Remote
With the garage door opener type identified and the universal remote prepared, it’s time to start programming. Follow these step-by-step instructions for the programming method appropriate for your garage door opener:
Dip Switch Programming:
- Start by locating the dip switch settings on both the garage door opener and the universal remote. These are usually small switches that can be toggled up or down.
- Referencing the garage door opener’s manual or online resources, set the dip switches on the opener to match the configuration of the universal remote.
- Once the dip switches are correctly set, hold the universal remote close to the garage door opener and press the programmed button or sequence to sync the devices.
- Test the remote by pressing the programmed button to ensure the garage door opens or closes as intended.
Wireless Programming:
- Start by accessing the programming mode on the garage door opener. This is usually done by pressing a specific combination of buttons or using a keyless entry PIN.
- With the opener in programming mode, press the appropriate button on the universal remote to initiate the syncing process. This may involve pressing and releasing the button multiple times or following a specific sequence.
- Wait for the confirmation signal from the opener, indicating that the remote has been successfully programmed. This may be a visual or audible cue, such as a flashing light or a sound emitted by the opener.
- Test the remote by pressing the programmed button to ensure the garage door opens or closes as intended.
Troubleshooting Tips
While programming a universal garage door remote is generally a straightforward process, there may be instances where complications arise. Here are some troubleshooting tips to help you overcome common issues:
- Ensure that the universal remote and the garage door opener are within close proximity during the programming process. This allows for a strong and reliable signal between the devices.
- Double-check the programming instructions and verify that you are following them correctly. One small mistake, such as a missed button or an incorrect dip switch setting, can prevent successful programming.
- If the remote does not sync with the opener after multiple attempts, it may be necessary to reset both devices and start the programming process from scratch.
- Consult the manufacturer’s website or contact their customer support if you encounter persistent issues. They may have additional troubleshooting steps or specific instructions for your particular model.
Additional Considerations
When programming a universal garage door remote, there are a few additional factors to keep in mind:
Battery Life:
Regularly check the battery of your universal remote to ensure it has enough power to operate. Replace the battery as needed to avoid disruptions in functionality.
Security:
Be mindful of security considerations when programming a universal remote. Follow the manufacturer’s guidelines for securing your remote and consider enabling additional security features, such as rolling codes, to prevent unauthorized access to your garage.
Compatibility:
While universal remotes are designed to work with a wide range of garage door openers, there may still be compatibility limitations. Before purchasing a universal remote, double-check that it is compatible with your specific garage door opener model or consult the manufacturer for recommendations.
Regular Maintenance:
Keep your garage door and opener well maintained to ensure smooth operation and minimize the need for frequent programming. Regularly lubricate moving parts, inspect for any damage, and address any issues promptly to extend the lifespan of your garage door system.
With this comprehensive guide, programming a universal garage door remote should be a breeze. Remember to consult the manufacturer’s instructions for your specific remote and opener, and follow the provided steps carefully. By successfully programming your universal remote, you’ll enjoy the convenience of controlling your garage door with just a single device.
Key Takeaways: How to Program a Universal Garage Door Remote
- Make sure you have the right remote for your garage door.
- Find the program button on your remote and hold it down.
- Press the corresponding button on your garage door opener.
- Release the program button on your remote.
- Test the remote to see if it works with your garage door.
Frequently Asked Questions
Welcome to our Frequently Asked Questions section where we address common queries about programming a universal garage door remote. Whether you’re a DIY enthusiast or just need to replace your lost remote, we’ve got you covered. Read on for answers to your most pressing questions!
1. Can I program a universal garage door remote myself or do I need professional help?
You can definitely program a universal garage door remote on your own! The process is designed to be user-friendly and doesn’t require any specialized technical knowledge. Simply follow the instructions provided with the remote or consult the manual for your garage door opener. Most universal remotes come with clear step-by-step instructions, making it easy for anyone to program them without professional assistance.
However, if you encounter any difficulties or have a complex garage door system, you can always reach out to a professional for guidance. They’ll be able to assist you in troubleshooting and ensure your remote is properly programmed.
2. What are the general steps to program a universal garage door remote?
While the exact steps may vary depending on the brand and model of your universal remote and garage door opener, there are some general steps you can follow:
1. Locate the “Learn” or “Program” button on your garage door opener. This button may be on the opener unit itself or on a separate remote control receiver.
2. Press and release the “Learn” or “Program” button, typically within 30 seconds of starting the programming process.
3. Within a set timeframe (usually about 30 seconds), press and hold the button on the universal remote that you want to use to control your garage door.
4. Release the button on the universal remote when the garage door opener lights or beeps, indicating that the programming was successful.
Remember to consult the manual provided with your universal remote for specific instructions tailored to your device.
3. Can I program a universal garage door remote if I don’t have an existing remote or working opener?
Yes, you can still program a universal garage door remote even if you don’t have a pre-existing remote or a working opener. In such cases, you’ll need to find the “Learn” or “Program” button on the garage door opener unit itself. This button is usually located near the light bulb or on the back panel of the opener.
Once you’ve located the button, follow the general programming steps by pressing and releasing the “Learn” or “Program” button, then pressing and holding the button on the universal remote. The opener should indicate that the programming was successful by lighting up or emitting a beep. If you encounter any difficulties, consult the manual for your specific garage door opener model for further guidance.
4. How many remotes can I program to my universal garage door opener?
The number of remotes you can program to your universal garage door opener depends on the specific model and brand. However, most universal garage door openers allow you to program multiple remotes, typically ranging from 2 to 4. Some advanced models even support programming up to 8 remotes.
To find out the maximum number of remotes you can program, refer to the manual or product specifications for your universal garage door opener. It’s always a good idea to check these details before purchasing extra remotes.
5. Can I program a universal remote to open multiple garage doors?
Yes, you can program a universal remote to open multiple garage doors if your opener setup includes multiple doors. Each garage door opener or receiver usually has a unique code, and the universal remote should be able to learn and store these codes for different doors.
To program a universal remote to control multiple garage doors, follow the instructions provided with the remote or consult the manual for your specific model. The process often involves assigning different buttons on the remote to each garage door, allowing you to open and close them individually or simultaneously.
Summary
So, to wrap it up, programming a universal garage door remote is not as difficult as it may seem. All you need to do is locate the Learn button on your garage door opener and follow the instructions provided by the remote manufacturer. Remember to test the remote after programming to ensure it’s working properly. And if you encounter any problems, don’t hesitate to consult the manual or reach out to customer support for assistance. With a little patience and careful following of the steps, you’ll have your universal remote up and running in no time!
In conclusion, programming a universal garage door remote involves finding the Learn button, following the remote’s instructions, and testing the remote. Don’t worry if you encounter any issues – the manual and customer support are there to help. Just be patient and follow the steps, and soon you’ll have your universal remote ready to open and close your garage door effortlessly.